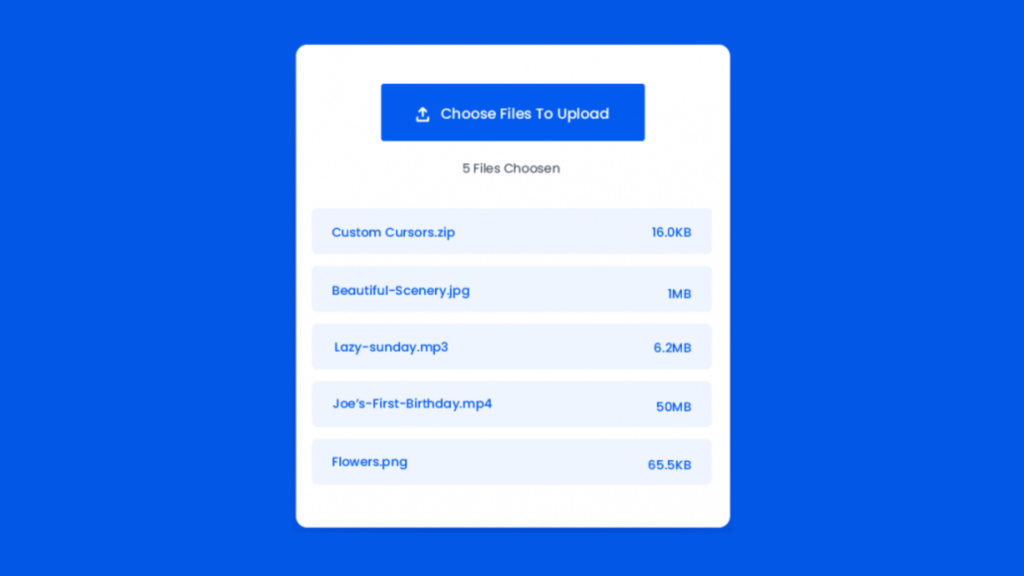
Let’s create a Custom File Upload Button using HTML, CSS, and JavaScript. This project is perfect for beginners and will help you understand how to customize form elements.
We’ll use HTML to set up the button, CSS to style it and make it look unique, and JavaScript to handle the file upload functionality. It’s a simple project but a great way to learn some basic web development skills!
Let’s get started on building this Custom File Upload Button. Whether you’re new to coding or looking to enhance your skills, this project is for you. Let’s dive in and create a stylish file upload button together!
HTML :
This HTML code creates a webpage with a custom file upload button. It includes Font Awesome icons and Google Fonts for styling. The body contains a container with an input element for file selection, a label for the custom button, a display area for the number of files chosen, and an unordered list for displaying the selected files.
<!DOCTYPE html>
<html lang="en">
  <head>
    <meta name="viewport" content="width=device-width, initial-scale=1.0" />
    <title>Custom File Upload Button</title>
    <!-- Font Awesome Icons -->
    <link
      rel="stylesheet"
      href="https://cdnjs.cloudflare.com/ajax/libs/font-awesome/6.2.0/css/all.min.css"
    />
    <!-- Google Fonts  -->
    <link
      href="https://fonts.googleapis.com/css2?family=Poppins:wght@400;500&display=swap"
      rel="stylesheet"
    />
    <!-- Stylesheet -->
    <link rel="stylesheet" href="style.css" />
  </head>
  <body>
    <div class="container">
      <input type="file" id="file-input" multiple />
      <label for="file-input">
        <i class="fa-solid fa-arrow-up-from-bracket"></i>
          Choose Files To Upload
      </label>
      <div id="num-of-files">No Files Choosen</div>
      <ul id="files-list"></ul>
    </div>
    <!-- Script -->
    <script src="script.js"></script>
  </body>
</html>
CSS :
This CSS code sets up styling for the webpage created with the HTML code. It styles the container with specific dimensions, positioning, padding, border-radius, and box-shadow. The file input is hidden, and a label is styled to act as the file upload button. The number of files selected is styled, and an unordered list is customized to display selected files with specific formatting and spacing.
* {
  padding: 0;
  margin: 0;
  box-sizing: border-box;
  font-family: "Poppins", sans-serif;
}
body {
  background-color: #025bee;
}
.container {
  background-color: #ffffff;
  width: 90%;
  max-width: 34.37em;
  position: relative;
  margin: 3.12em auto;
  padding: 3.12em 1.25em;
  border-radius: 0.43em;
  box-shadow: 0 1.25em 2.18em rgb(1, 28, 71, 0.3);
}
input[type="file"] {
  display: none;
}
label {
  display: block;
  position: relative;
  background-color: #025bee;
  color: #ffffff;
  font-size: 1.12em;
  font-weight: 500;
  text-align: center;
  width: 18.75em;
  padding: 1.12em 0;
  margin: auto;
  border-radius: 0.31em;
  cursor: pointer;
}
#num-of-files {
  font-weight: 400;
  text-align: center;
  margin: 1.25em 0 1.87em 0;
}
ul {
  list-style-type: none;
}
.container li {
  font-weight: 500;
  background-color: #eff5ff;
  color: #025bee;
  margin-bottom: 1em;
  padding: 1.1em 1em;
  border-radius: 0.3em;
  display: flex;
  justify-content: space-between;
}
JavaScript:
This JavaScript code adds functionality to the file input element. When files are selected, it updates the display to show the number of files selected and creates a list of the selected files with their names and sizes. If a file’s size is larger than or equal to 1MB, it displays the size in megabytes instead of kilobytes.
let fileInput = document.getElementById("file-input");
let fileList = document.getElementById("files-list");
let numOfFiles = document.getElementById("num-of-files");

fileInput.addEventListener("change", () => {
  fileList.innerHTML = "";
  numOfFiles.textContent = `${fileInput.files.length} Files Selected`;

  for (i of fileInput.files) {
    let reader = new FileReader();
    let listItem = document.createElement("li");
    let fileName = i.name;
    let fileSize = (i.size / 1024).toFixed(1);
    listItem.innerHTML = `<p>${fileName}</p><p>${fileSize}KB</p>`;
    if (fileSize >= 1024) {
      fileSize = (fileSize / 1024).toFixed(1);
      listItem.innerHTML = `<p>${fileName}</p><p>${fileSize}MB</p>`;
    }
    fileList.appendChild(listItem);
  }
});
Creating a Custom File Upload Button in HTML, CSS, and JavaScript is a fun beginner project. It enhances skills in customizing form elements, styling with CSS, and adding functionality with JavaScript. Happy coding!
If your project has problems, don’t worry. Just click to download the source code and face your coding challenges with excitement. Have fun coding!
