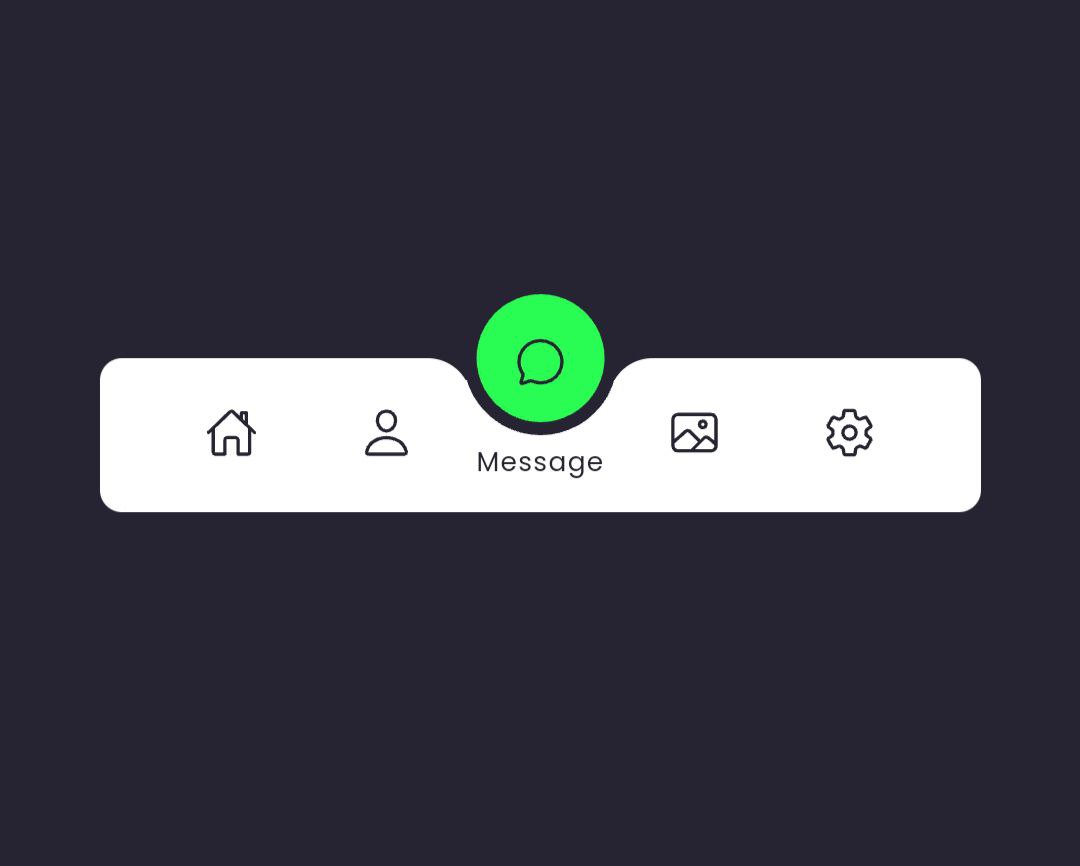
Hello folks! Today, let’s work on creating a Magic Navigation Menu Indicator using HTML, CSS, and JavaScript. It’s a cool way to add a touch of magic to your website’s navigation. Whether you’re a seasoned coder or just starting out, this tutorial is an exciting opportunity to elevate your skills and bring some enchantment to your web projects.
We’ll use HTML for the structure, CSS for styling, and JavaScript for the magical navigation effect. No need for anything complex – just simple coding to make your website navigation stand out.
Join me on this coding journey into the world of Magic Navigation Menu Indicators. We’ll keep it simple and enjoyable with HTML, CSS, and JavaScript. Ready to add a bit of magic to your website? Let’s dive in and create a captivating navigation experience!
HTML :
This HTML code creates a navigation menu with Home, Profile, Messages, Photos, and Settings options. Each option consists of an icon and text. The navigation is enhanced using Ionicons for icons and includes an indicator element, likely used to highlight the active menu item.
<!DOCTYPE html>
<html lang="en" >
<head>
  <meta charset="UTF-8">
  <title>Magic Navigation Menu Indicator | Coding Stella</title>
  <link rel="stylesheet" href="./style.css">

</head>
<body>
<!-- partial:index.partial.html -->
<div class="navigation">
        <ul>
            <li class="list active">
                <a href="#">
                    <span class="icon">
                        <ion-icon name="home-outline"></ion-icon>
                    </span>
                    <span class="text">Home</span>
                </a>
            </li>
            <li class="list">
                <a href="#">
                    <span class="icon">
                        <ion-icon name="person-outline"></ion-icon>
                    </span>
                    <span class="text">Profile</span>
                </a>
            </li>
            <li class="list">
                <a href="#">
                    <span class="icon">
                        <ion-icon name="chatbubble-outline"></ion-icon>
                    </span>
                    <span class="text">Message</span>
                </a>
            </li>
            <li class="list">
                <a href="#">
                    <span class="icon">
                        <ion-icon name="image-outline"></ion-icon>
                    </span>
                    <span class="text">Photos</span>
                </a>
            </li>
            <li class="list">
                <a href="#">
                    <span class="icon">
                        <ion-icon name="settings-outline"></ion-icon>
                    </span>
                    <span class="text">Settings</span>
                </a>
            </li>
            <div class="indicator"></div>
        </ul>
    </div>
<!-- partial -->
  <script src='https://unpkg.com/ionicons@5.5.2/dist/ionicons/ionicons.js'></script>
<script src='https://unpkg.com/ionicons@5.5.2/dist/ionicons/ionicons.esm.js'></script><script  src="./script.js"></script>

</body>
</html>
CSS :
This CSS code styles a navigation menu with a fixed width and height, utilizing flexbox for layout. Each menu item consists of an icon and text, positioned with transitions for smooth movement. An indicator, represented as a circle, highlights the active menu item.
The indicator’s position is adjusted dynamically using translateX, indicating the active menu item’s selection. The root variables (--clr) define the color scheme, with careful attention paid to transitions and hover effects for a polished user experience.
@import url('https://fonts.googleapis.com/css2?family=Poppins:wght@100;200;300;400;500;600;700;800;900&display=swap');

*
{
    margin: 0;
    padding: 0;
    box-sizing: border-box;
    font-family: 'Poppins',sans-serif;
}
:root
{
    --clr:#222327;

}
body
{
    display: flex;
    justify-content: center;
    align-items: center;
    min-height: 100vh;
    background: var(--clr);
}
.navigation
{
    width: 400px;
    height: 70px;
    background: #fff;
    position: relative;
    display: flex;
    justify-content: center;
    align-items: center;
    border-radius: 10px;
}
.navigation ul
{
    display: flex;
    width: 350px;
}
.navigation ul li
{
    position: relative;
    list-style: none;
    width: 70px;
    height: 70px;
    z-index: 1;
}
.navigation ul li a
{
    position: relative;
    display: flex;
    justify-content: center;
    align-items: center;
    flex-direction: column;
    width: 100%;
    text-align: center;
    font-weight: 500;
}
.navigation ul li a .icon
{
    position: relative;
    display: block;
    line-height: 75px;
    font-size: 1.5rem;
    text-align: center;
    transition: 0.5s;
    color: var(--clr);
}
.navigation ul li.active a .icon
{
    transform: translateY(-32px);
}
.navigation ul li a .text
{
    position: absolute;
    color: var(--clr);
    font-weight: 400;
    font-size: 0.75em;
    letter-spacing: 0.05em;
    transition: 0.5s;
    opacity: 0;
    transform: translateY(20px);
}
.navigation ul li.active a .text
{
    transform: translateY(10px);
    opacity: 1;
}
.indicator
{
    position: absolute;
    top: -50%;
    width: 70px;
    height: 70px;
    background: #29fd53;
    border-radius: 50%;
    border: 6px solid var(--clr);
    transition: 0.5s;
}
.indicator::before
{
    content: '';
    position: absolute;
    top: 50%;
    left: -22px;
    width: 20px;
    height: 20px;
    background: transparent;
    border-top-right-radius: 20px;
    box-shadow: 1px -10px 0 0 var(--clr);
}
.indicator::after
{
    content: '';
    position: absolute;
    top: 50%;
    right: -22px;
    width: 20px;
    height: 20px;
    background: transparent;
    border-top-left-radius: 20px;
    box-shadow: -1px -10px 0 0 var(--clr);
}
.navigation ul li:nth-child(1).active ~ .indicator
{
    transform: translateX(calc(70px * 0));
}
.navigation ul li:nth-child(2).active ~ .indicator
{
    transform: translateX(calc(70px * 1));
}
.navigation ul li:nth-child(3).active ~ .indicator
{
    transform: translateX(calc(70px * 2));
}
.navigation ul li:nth-child(4).active ~ .indicator
{
    transform: translateX(calc(70px * 3));
}
.navigation ul li:nth-child(5).active ~ .indicator
{
    transform: translateX(calc(70px * 4));
}
JavaScript :
The code sets up a function that handles clicks on elements marked with the class ‘.list’. When an element is clicked, it removes the ‘active’ class from all elements with that class and adds the ‘active’ class to the clicked element, allowing only one element to be ‘active’ at a time.
const list = document.querySelectorAll('.list');
function activeLink(){
    list.forEach((item)=>
    item.classList.remove('active'));
    this.classList.add('active');
}
list.forEach((item) =>
item.addEventListener('click',activeLink));
In conclusion, we’ve created a responsive navigation menu using HTML, CSS, and JavaScript. The HTML sets up the structure, CSS provides styling and animations, and JavaScript ensures a smooth interaction by activating one menu item at a time. Now, feel free to customize and experiment to make it uniquely yours!
If you encounter any difficulties while working on your magic indicator navigation menu, fear not. You can freely obtain the source code files for this project. Simply click the Download button to kickstart your journey. Enjoy coding!
