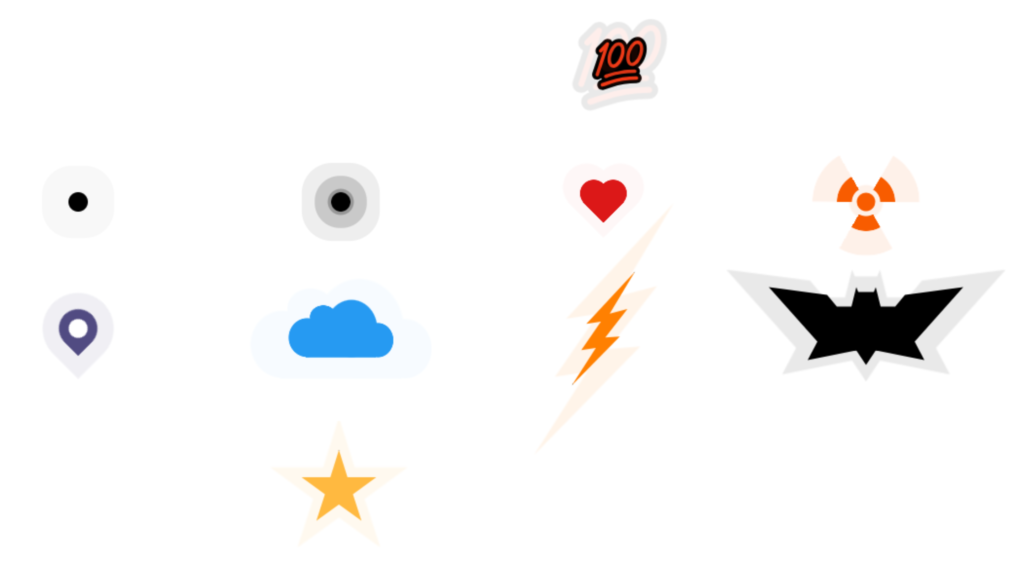
Hello coding enthusiasts! Today, let’s explore the world of pulsing loading effects using just HTML and CSS. We’re going to create 10 different styles to add a dynamic touch to your loading screens.
Whether you’re a coding pro or just starting out, this tutorial offers a simple and fun way to enhance your web projects. No need for complex setups – just straightforward HTML and CSS to bring life to your loading animations.
Join me on this creative journey as we delve into the variety of pulsing effects. Let’s keep it simple and stylish with HTML and CSS. Ready to level up your loading screens? Let’s get started!
HTML :
This HTML code creates a webpage with a pulsing loading effect. It includes ten div elements with different class names (pulsing-1 to pulsing-10). The last div (pulsing-10) has a custom attribute (data-c) set to the emoji “💯”. These div elements are likely styled using CSS to achieve a pulsating animation, providing a visually dynamic loading effect.
<!DOCTYPE html>
<html lang="en" >
<head>
  <meta charset="UTF-8">
  <title>The pulsing - Loading effect</title>
  <link rel="stylesheet" href="./style.css">

</head>
<body>
<!-- partial:index.partial.html -->
<div class="pulsing-1"></div>
<div class="pulsing-2"></div>
<div class="pulsing-3"></div>
<div class="pulsing-4"></div>
<div class="pulsing-5"></div>
<div class="pulsing-6"></div>
<div class="pulsing-7"></div>
<div class="pulsing-8"></div>
<div class="pulsing-9"></div>
<div class="pulsing-10" data-c="💯"></div>
<!-- partial -->

</body>
</html>
CSS :
This CSS code creates a set of ten pulsating loading animations with different shapes and styles. Each “pulsing” class corresponds to a distinct animation. These animations include circular pulses, gradients, transformations, and various shapes. The final animation (pulsing-10) displays a pulsating emoji. The code uses keyframes for the pulsating effect, creating visually dynamic loading animations.
.pulsing-1 {
  width:20px;
  height:20px;
  border-radius: 50%;
  background:#000;
  box-shadow: 0 0 0 0 #0004;
  animation:pl1 1s infinite;
}
@keyframes pl1 {
    100% {box-shadow: 0 0 0 30px #0000}
}

.pulsing-2 {
  width:20px;
  height:20px;
  border-radius: 50%;
  background:#000;
  box-shadow: 0 0 0 0 #0004;
  animation:pl2 1.5s infinite linear;
  position: relative;
}
.pulsing-2:before,
.pulsing-2:after {
  content:"";
  position: absolute;
  inset:0;
  border-radius: inherit;
  box-shadow: 0 0 0 0 #0004;
  animation: inherit;
  animation-delay: -0.5s;
}
.pulsing-2:after {
  animation-delay: -1s;
}
@keyframes pl2 {
    100% {box-shadow: 0 0 0 40px #0000}
}

.pulsing-3 {
  width:50px;
  height:50px;
  color:#dc1818;
  background:
   radial-gradient(circle at 60% 65%, currentColor 62%, #0000 65%) top left,
   radial-gradient(circle at 40% 65%, currentColor 62%, #0000 65%) top right,
   linear-gradient(to bottom left, currentColor 42%,#0000 43%) bottom left ,
   linear-gradient(to bottom right,currentColor 42%,#0000 43%) bottom right;
  background-size:50% 50%;
  background-repeat:no-repeat;
  position:relative;
}
.pulsing-3:after {
  content:"";
  position:absolute;
  inset:0;
  background:inherit;
  opacity:0.4;
  animation:pl3 1s infinite;
}
@keyframes pl3 {
  to {transform:scale(1.8);opacity:0}
}

.pulsing-4 {
  width:60px;
  height:60px;
  position:relative;
}
.pulsing-4:before,
.pulsing-4:after {
  content:"";
  position:absolute;
  border-radius: 50%;
  inset:0;
  background:
    radial-gradient(circle 10px,#f85c00 94%,#0000),
    repeating-conic-gradient(from -30deg,#0000 0 60deg,#f85c00 61deg 120deg);
  -webkit-mask:radial-gradient(circle 15px,#000 calc(100% - 6px),#0000 calc(100% - 5px) 94%,#000);
}

.pulsing-4:after {
  animation:pl4 1s infinite;
  transform: perspective(300px) translateZ(0px)
}

@keyframes pl4 {
  to {transform:perspective(300px) translateZ(150px);opacity:0}
}

.pulsing-5 {
  width:80px;
  height:80px;
  position:relative;
}
.pulsing-5:before,
.pulsing-5:after {
  content:"";
  position:absolute;
  inset:0;
  background:#ffb940;
  box-shadow: 0 0 0 50px;
  clip-path: polygon(50% 0%, 61% 35%, 98% 35%, 68% 57%, 79% 91%, 50% 70%, 21% 91%, 32% 57%, 2% 35%, 39% 35%);
}

.pulsing-5:after {
  animation:pl5 1s infinite;
  transform:perspective(300px) translateZ(0px)
}

@keyframes pl5 {
  to {transform:perspective(300px) translateZ(150px);opacity:0}
}

.pulsing-6 {
  width:40px;
  height:40px;
  position:relative;
  transform:rotate(45deg);
}
.pulsing-6:before,
.pulsing-6:after {
  content:"";
  position:absolute;
  inset:0;
  border-radius: 50% 50% 0 50%;
  background:#514b82;
  -webkit-mask:radial-gradient(circle 10px at 50% 50%,#0000 94%,#000);
}

.pulsing-6:after {
  animation:pl6 1s infinite;
  transform: perspective(300px) translateZ(0px)
}

@keyframes pl6 {
  to {transform:perspective(300px) translateZ(150px);opacity:0}
}

.pulsing-7 {
  width: 108px;
  height: 60px;
  color:#269af2;
  --c:radial-gradient(farthest-side,currentColor 96%,#0000);
  background:
    var(--c) 100% 100% /30% 60%,
    var(--c) 70%  0    /50% 100%,
    var(--c) 0    100% /36% 68%,
    var(--c) 27%  18%  /26% 40%,
    linear-gradient(currentColor 0 0) bottom/67% 58%;
  background-repeat: no-repeat;
  position: relative;
}

.pulsing-7:after {
  content:"";
  position:absolute;
  inset:0;
  background:inherit;
  opacity:0.4;
  animation:pl7 1s infinite;
}
@keyframes pl7 {
  to {transform:scale(1.8);opacity:0}
}

.pulsing-8 {
  width:65px;
  height:117px;
  position:relative;
}
.pulsing-8:before,
.pulsing-8:after {
  content:"";
  position:absolute;
  inset:0;
  background:#ff8001;
  box-shadow: 0 0 0 50px;
  clip-path: polygon(100% 0, 23% 46%, 46% 44%, 15% 69%, 38% 67%, 0 100%, 76% 57%, 53% 58%, 88% 33%, 60% 37%);;
}

.pulsing-8:after {
  animation:pl8 1s infinite;
  transform:perspective(300px) translateZ(0px)
}

@keyframes pl8 {
  to {transform:perspective(300px) translateZ(180px);opacity:0}
}

.pulsing-9 {
  width:100px;
  height:45px;
  position:relative;
}
.pulsing-9:before,
.pulsing-9:after {
  content:"";
  position:absolute;
  inset:0;
  background:#000;
  box-shadow: 0 0 0 50px;
  clip-path: polygon(-50px -20px,10% -12px,20% 0,calc(50% - 15px) 0,calc(50% - 10px) -20px,calc(50% - 8px) -15px,calc(50% + 8px) -15px,calc(50% + 10px) -20px,calc(50% + 15px) 0,80% 0,90% -12px,calc(100% + 50px) -20px,100% 80%,calc(100% + 10px) calc(100% + 10px),60% 100%,50% calc(100% + 15px),40% 100%,-10px calc(100% + 10px),0 80%);
}

.pulsing-9:after {
  animation:pl9 1s infinite;
  transform:perspective(300px) translateZ(0px)
}

@keyframes pl9 {
  to {transform:perspective(300px) translateZ(100px);opacity:0}
}

.pulsing-10 {
  display: grid;
  font-size: 50px;
}
.pulsing-10:before,
.pulsing-10:after {
  content:attr(data-c);
  grid-area: 1/1;
}

.pulsing-10:after {
  animation:pl10 1s infinite;
}

@keyframes pl10 {
  to {transform:scale(1.8);opacity:0}
}

/**/
body {
  display: grid;
  grid-template-columns: repeat(auto-fit,minmax(250px,1fr));
  grid-auto-rows: 130px;
  place-items:center;
}

* {
  box-sizing: border-box;
}
We did it! 🚀 We’ve successfully created 10 cool pulsing loading effects using only HTML and CSS. Whether you’re a coding newbie or a pro, I hope you enjoyed the process and can now use these animations to add a bit of flair to your web projects.
Facing any problems in your project ? Stay confident! Click Download, obtain the source code, and tackle your coding issues with determination. May your coding experience be smooth and rewarding!
